POS Checkout Screen
The main checkout screen — add items, take payment, and complete a sale.
The Checkout Screen is where most sales happen — scan or search for products, take payment, and complete the transaction.
Before you can sell: open a cash drawer
You need to open a cash drawer once a day, before you can ring up any sales — the app enforces this, not just recommends it.
The dialog appears automatically
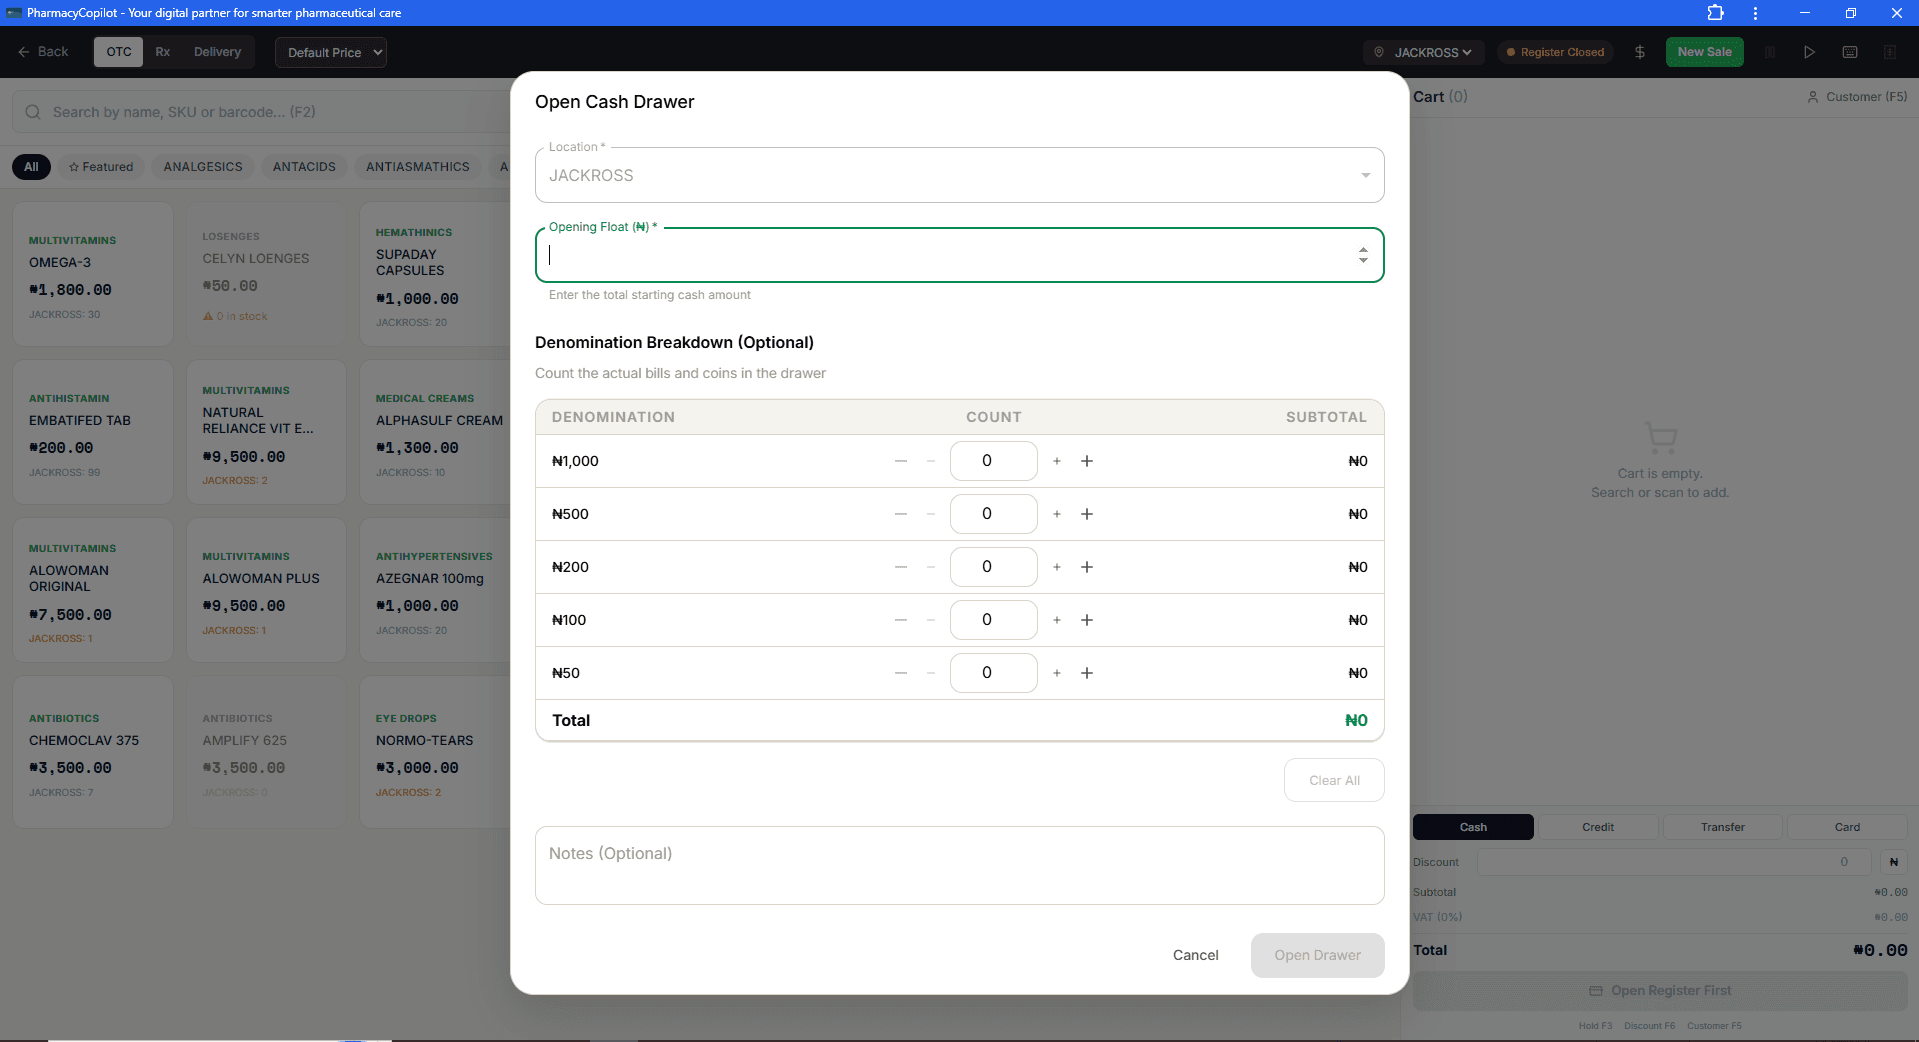
The Open Cash Drawer dialog pops up on its own the moment you land on the Checkout Screen and no drawer is currently open for your location. You can also open it manually any time by selecting the $ icon next to the register-status badge.
Register your opening float
Enter the Opening Float — the total starting cash amount for the day.
Specify the denomination breakdown
Count the actual notes in the drawer and enter each denomination (₦1,000 down to ₦50). This is optional, but recommended so your count is accurate later.
Select Open Drawer
Once you select Open Drawer, the register status switches to Register Open and you can now ring up sales. Until then, the Pay button on this screen stays disabled and reads "Open Register First."
If you cancel this dialog instead, it won't pop up again for the rest of your session — but the register stays closed, and you'll still need to open it via the $ icon before you can take payment. See Opening a Cash Drawer for the full field reference.
Reading the screen
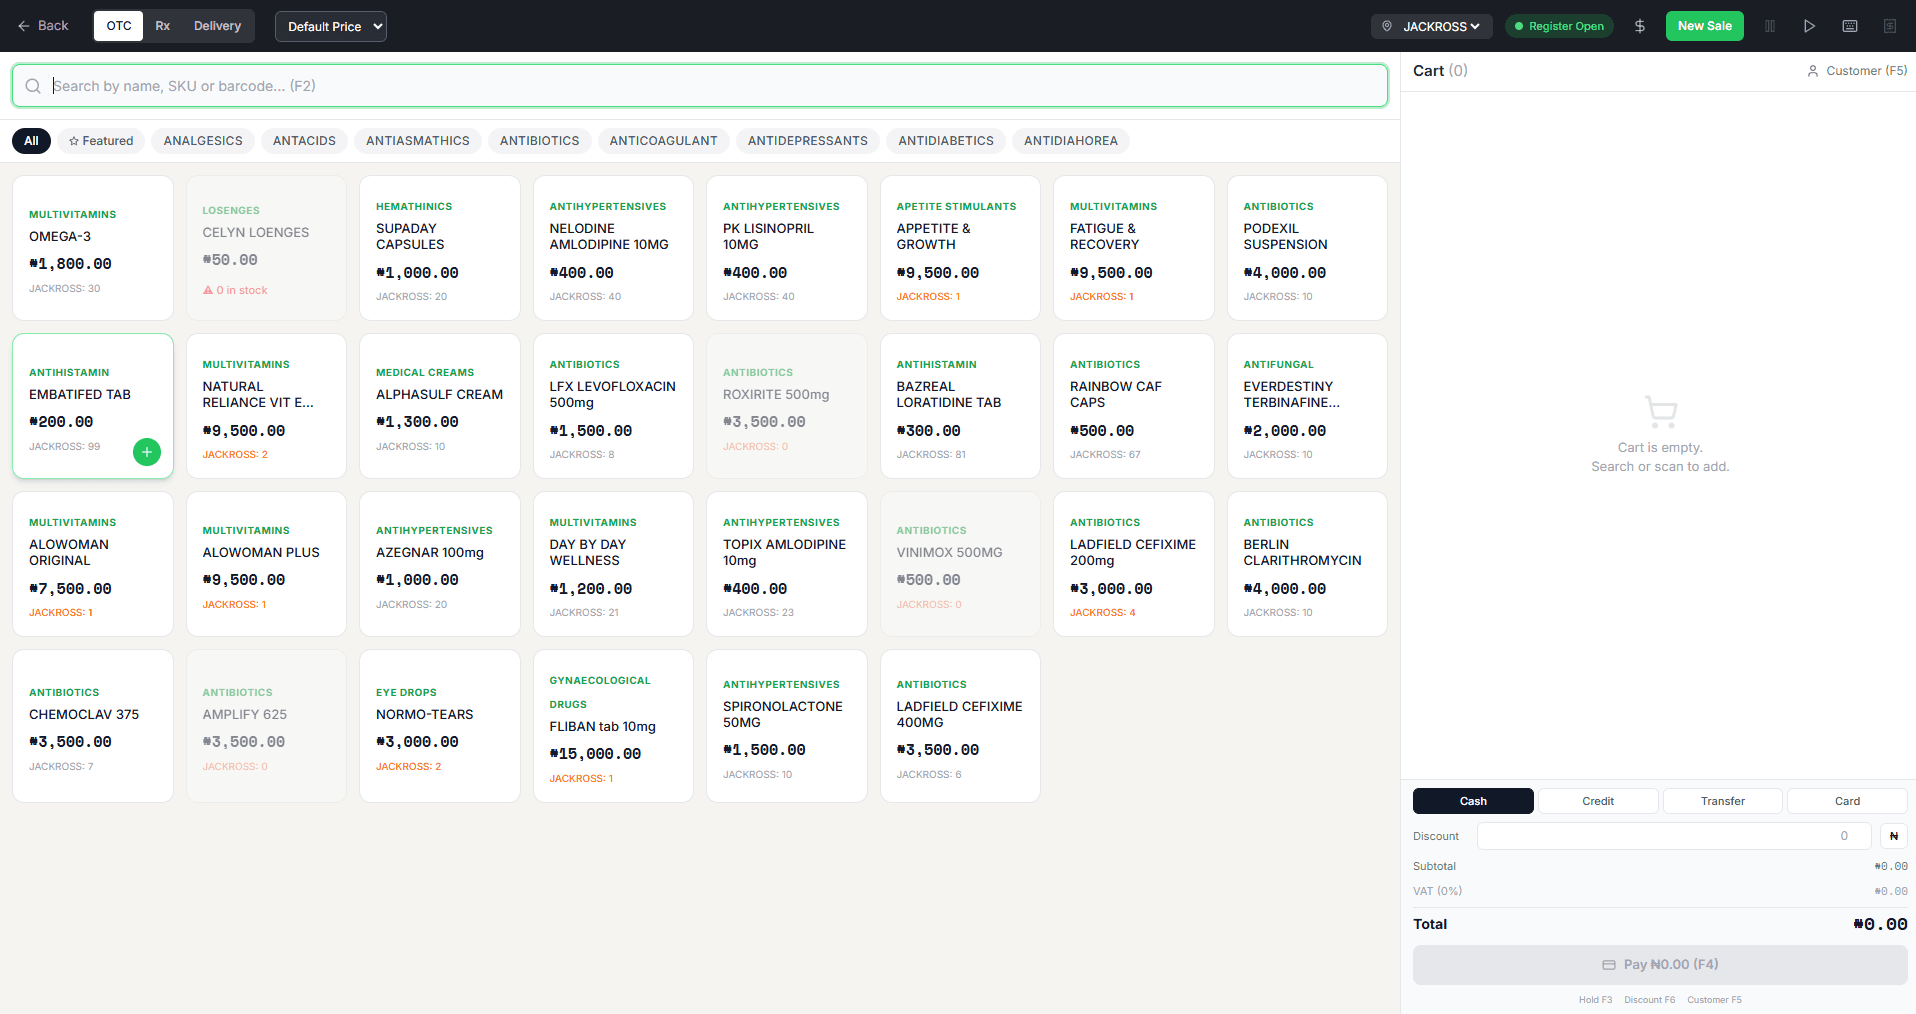
- Sale-type tabs (top left) — OTC, Rx, or Delivery — switch which catalog and workflow the sale uses.
- Price list dropdown — which Selling Price Group this sale charges from (shown here as Default Price). Switching it live-recalculates every item already in the cart, not just items added afterward. It's also set automatically when you attach a customer belonging to a Customer Group linked to a price group — you can still override it by hand afterward.
- Location and register status (top right) — the active location (here, JACKROSS) and whether the register is Open or Closed — see Before you can sell above.
- Product grid — each card shows the category, product name, price, and stock at the current location. A count in orange (like Roxirite 500mg's
JACKROSS: 0) means it's out of stock at this location; the card is grayed out but still searchable. A Variable product's card shows "Choose variation" instead of a price — see below. - Cart panel (right) — empty until you add something, then shows every line item, the customer (if one is attached), and the payment total.
Step by step
Choose the sale type
Pick OTC, Rx, or Delivery before searching — this determines which validation rules and fields apply to the sale.
Find and add products
Search by name, SKU, or barcode (F2 focuses the search box), or browse by category using the filter chips below it. Selecting a product card adds it to the cart. See Barcode Scanning at Checkout and Low Stock & Expiring Products at Checkout for what gets flagged inline as you add items. A sale can hold up to 200 line items.
Tapping a Variable product's card (e.g. "Paracetamol") opens a "— choose a variation" picker listing each of its variations with their own price and stock, instead of adding the tapped card directly — the parent itself can never be added to a cart.
Review the cart
Confirm quantities and line items in the cart panel. Attach a Customer (F5) if the sale needs one — required for anything other than a fully-paid cash sale (see the warning below) — and apply a Discount (F6) if needed.
If the customer belongs to a Customer Group linked to a Selling Price Group, attaching them switches the sale's price group (and every item's price) to match — see Customer Groups.
Choose a payment method
The screen's quick-select tabs cover Cash, Credit, Transfer, and Card — a cheque payment or a split across multiple methods in one sale are also supported, just not shown as their own top-level tab here.
If the amount paid is less than the total, a customer must be selected on the sale — an anonymous walk-in credit sale is rejected with "A customer must be selected when the amount paid is less than the total (outstanding balance)."
Complete the sale
Press Pay (F4) once the amount and method are set. The sale is finalized and a receipt is available — see Printing & Reprinting a Receipt.
If you need to walk away mid-sale
Save it as a Draft (F3 to hold) rather than losing the cart.
Point of Sale & Business Operations
Checkout, inventory, purchasing, accounting, and HR & payroll — everything that runs the business side of your pharmacy.
New Sale (Manual Entry)
Create a sale from a form rather than the live checkout screen — walk-in and credit sales, discounts, tax, shipping, and payment all on one screen.